CANCEL
2022-04-25 09:47:17
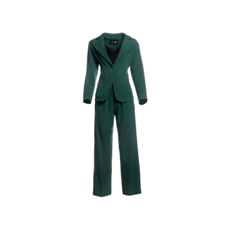
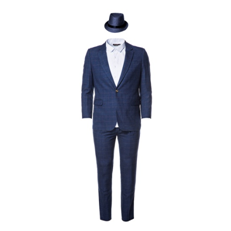
Compared to hiring models, using mannequins to image your clothes is a cost-effective way to promote your products. However, mannequins can be distracting for customers, so a good alternative is to create invisible mannequin effects for your product images. Do you know how to shoot invisible mannequin effect?
1. Make a plan
It is vital to set up a white background and prepare the clothing you want to photograph. Make sure you have all the mannequins you need. Meanwhile, white matte mannequins are generally less reflective and blend well with white backgrounds, which will make editing mannequins from images easier. You also need to ensure you have good lighting. High-quality photos are the key to getting the perfect invisible mannequin photo.
2. Place your product
How you place your product is just as important as good lighting when it comes to taking high-quality product photos. This is especially true for photographing invisible mannequins. You need to set your camera height to chest height for tops and hip height for bottoms. Angles that differ from these standards may make your product look inferior than it actually is.
Also, you need to choose a mannequin of the right size to display your product. When your products are displayed on your mannequin, they should look natural and comfortable.
3. Take the image
Each product requires at least three to four shots. Take a front and back photo on the mannequin, and a flat front and back photo on the white foam board. When you digitally remove the mannequin in Photoshop, you should also take a few photos of the inside and outside of the product to fill in the gaps left. At the same time, the lighting should be the same for each shot.
4. Edit your photos
Edit graphics using some tools in Photoshop. The tutorial is as follows:
(1) Add layers
Open your mannequin image and foam board image to view front or rear views. Create a new background layer in each file and fill it with white by using the paint bucket tool. In both file layers, these white background layers need to be the first layer in the hierarchy.
(2) Insulation
Select your product image layer and the isolation tools which you prefer, such as quick selection, magic wand, etc. Then, insulate your clothes from the mannequins and the white background.
(3) Perfection
Now it’s time to refine the details of the template you just created. The tools for optimizing the edges are perfect for this step. You can find it under the selection menu. You just need to click OK button on the optimize edge command. Use layers with the cut command to complete the isolation process. Continue and delete the rest of the original image layer so that only your product and white background layer remain. Then, repeat the same steps for your foam board flat images.
(4) Combination
When you remove the mannequin, use your inside-out foam board image to visually fill in the blanks left behind. You may need to adjust the positioning or proportions slightly to get a perfect fit. In addition, you can use the brush tool to darken some naturally shaded areas to make the image look more realistic. And just like that, you’ve made a phantom model image.
Finally, on the subject of making invisible mannequins, there is a ghost dummy which particularly suitable for costume shoots. It will help you save a lot of time and money. For your convenience, you’re welcome to check the product link to find more details: https://www.alibaba.com/product-detail/GH21-high-end-removable-female-mannequin_1600430976908.html?spm=a2747.manage.0.0.234c71d2421QT0.